The Pico do Arieiro to Pico Ruivo hike is one of the most popular hikes on the island of Madeira Island and attracts hikers from all around the world.
Most people are drawn to this hike because it starts from the third highest point on the island, Pico do Areeiro, commonly known as Pico do Arieiro (1,818 meters), and ends at the highest mountain, which is Pico Ruivo (1,862 meters).
The Pico Ruivo Trail is about 12 kilometers round trip and traverses part of the Central Mountain Mossif, an area integrated in the Natura 2000 Network.
Many visitors choose to hike it as an out-and-back because they travel with their own vehicle. I spent my birthday in Madeira this year and this is exactly what we chose to do.
The trail is challenging as it has steep climbs and steep drops, and sometimes follows a narrow path, but the incredible panoramic view you see along the way is exactly what makes it a great hike that you don’t want to miss.

In this complete guide, you’ll find out everything you need to know about the Pico to Pico Ruivo hike and why it’s one of the best things to add to your Madeira itinerary.
- What is PR 1?
- PR1 Trail Map
- Pico do Arieiro to Pico Ruivo Trail Summary
- Getting To The Pico do Arieiro to Pico Ruivo Trailhead
- When Is The Best Time To Hike Pico do Arieiro?
- Best Time To Arrive For Sunrise
- Pico do Ariero Parking
- Pico do Ariero Trailhead
- Pico do Arieiro Summit
- Ninho da Manta Viewpoint
- Staircase To Heaven
- Miradouro Pedra Rija
- Another Descent
- Through The Tunnels
- The Steepest Staircase
- Up The Switchbacks
- PR1 Trail Junctions
- Casa de Abrigo Mountain Hut
- Pico Ruivo Summit
- PR 1.2 to Achada do Teixeira
- Return to Pico do Arieiro
- Quick Safety Tips
- Follow Leave No Trace Principles
- Check out my Portugal travel videos!
- Pin To Read Later
PackedForPortugal.com contains affiliate links to various products, which means I may earn a small commission for qualifying purchases at no extra cost to you. Thank you for supporting my website. Read more about my Affiliate Disclosure.
What is PR 1?
There are currently 23 footpaths in Madeira that have been officially recommended by the Regional Government of Madeira.
Each levada or vereda footpath is labeled with the code (PR) to show their classification as a small route or short walk, and each one is given an identification number.
PR1 is the code for Verada do Areeiro, which is the hike from Pico do Arieiro to Pico Ruivo. The trail connects the three highest peaks of the island. It begins at the Pico do Areeiro (1818 m), crosses Pico das Torres (1851 m), and ends at Pico Ruivo (1862 m).
Here are the other connecting PR1 hikes:
- PR 1.1 Vereda da Ilha (Pico Ruivo to Ilha)
- PR 1.2 Vereda do Pico Ruivo (Achada do Teixeira to Pico Ruivo)
- PR 1.3 Vereda da Encumeada (Pico Ruivo to Encumeada)
PR1 Trail Map

Pico do Arieiro to Pico Ruivo Trail Summary
Distance: The total distance is 12 km round trip (nearly 7.5 miles) when you start from Pico Arieiro and return to Pico do Arieiro.
Time: Most visitors can complete the round trip hike in 3 to 5 hours. It may take you longer depending on your own pace, hiking fitness, and how busy the trail is. If you don’t have the time to hike both ways, you can arrange a transfer.
Elevation: You will gain about 1,000 meters of incline hiking out and back. Most of the steep inclines you ascend are built-in steps and ladders. It can feel like a strenuous hike if you’re not much of a hiker.
Difficulty: Moderate; The trail is well-maintained with handrails for increased safety, but there are challenging obstacles along the way, including steep, metal steps, uneven terrain, and dark tunnels. I consider the trail to be moderate with the amount of elevation gain and loss.

Getting To The Pico do Arieiro to Pico Ruivo Trailhead
If you are planning on hiking Pico to Pico then you will start your hike from Pico do Arieiro, and the trailhead is labeled as PR1 Verada do Areeiro on Google Maps (shown below).
Travel By Car
Since we rented a car in Madeira, it was easy for us to drive to the trailhead from Funchal on the morning of our self-guided hike. It took about 35 minutes from where we were staying in Funchal to drive to the car park.
By the time we reached the area, the upper parking lot closest to the observatory was full so we had to park at the lower parking lot, which added a 10 minute walk up to the starting point.
Book A Taxi
If you don’t have your own vehicle or rental car, you can book a taxi. It will cost about €40 for a one-way taxi ride from the Funchal area to Pico do Arieiro.
Pico To Pico Transfer
Another popular way to get to the starting point of the Pico do Arieiro to Pico Ruivo hike is to organize a transfer, which is a great option if you only want to hike one way and in one direction.
When you book a Pico to Pico Hike Transfer, you will get dropped off and picked up later in the day from Achada do Teixeira. Keep in mind, this route is still 10 km long.
Guided Tour
A Pico to Pico guided hiking tour is a great option for anyone looking for a pick-up and drop-off from Funchal, Camara de Lobos, or Caniço.
An experienced and local guide will lead you from Pico do Arieiro to the Pico Ruivo summit, so you don’t have to worry about all of the little details.
You will continue to Achada do Teixeira before getting picked up for your return to the city.
Pico do Arieiro Google Maps Directions
Get directions to Pico do Arieiro on Google Maps here.
When Is The Best Time To Hike Pico do Arieiro?
The best time to hike the Pico do Areeiro to Pico Ruivo trail is during the spring and fall seasons when the weather is cooler and more comfortable to for hiking.

Best Time To Arrive For Sunrise
Pico do Arieiro is one of the most popular places on Madeira to watch the sunrise and the sunset. Most tours and transfers don’t guarantee sunrise, so it’s best to travel with your own car if you want to visit during sunrise.
If you are planning to go on a sunrise hike, then you will first want to check the sunrise time. If you search “sunrise madeira” on Google, it will tell you the time of sunrise for that day.
Once you figure out what time the sunrise is, you will have to figure out how far away you are from the trailhead. You will want to arrive at least 30 minutes before sunrise. This gives you enough time to find a parking spot, walk up to the Pico do Arieiro summit, and set up your camera.
A lot of people anticipate a cloud inversion up here because of all of the photos online. Just keep in mind that it’s not always like this. We didn’t get to see or hike through thick clouds, but the sunrise was still amazing.
You can check weather conditions and forecast as well as the Pico do Arieiro webcam, but it really comes down to luck.
Start Your Hike Before Sunrise
If you want to avoid most of the crowds on the trail, you will want to start your hike about half an hour to one hour before sunrise. This is actually an amazing way to see different parts along the trail while the sun is rising. You will arrive at Pico Ruivo after sunrise, but the light will be amazing.
Another option is to start hiking about 2 hours early in order to watch the sunrise from the summit of Pico Ruivo. It will be dark along the trail so you will need to bring a headlamp. At least there are handrails along the way, so it is relatively safe to do this.
If you’re more interested in seeing the sunrise from Pico Ruivo, you may want to consider hiking from Achada do Teixeira to Pico Ruivo instead.
Avoiding The Heat
Most of the year, especially during the summer months (June, July, August, and September), it’s best to start your hike as early as possible due to the hot weather.
We started hiking just after sunset, and it didn’t take long to warm up. There was actually a heat wave during the week we were there in October so we ended up hiking in nearly 35-degree weather. It was so hot and hiking in the heat without much shade really sucked!
Hike Pico do Arieiro to Pico Ruivo
Pico do Ariero Parking
When you arrive at Pico do Arieiro with your own vehicle, you will find a couple of options for parking. There is an upper parking lot just beneath the summit. If you arrive one hour before sunrise, you will likely be able to get a parking spot here.
If you arrive later, you will be able a stream of car headlights driving up the mountain in front of you. If you see this, you will most likely have to park in the lower parking lot, which is about 1 km below.
From the lower car park, you will find some stairs across the road that lead uphill to the main trailhead. It’s basically a warm-up for your day hike!

Pico do Ariero Trailhead
The footpath for the trailhead starts on the left side of the Optical Observatory. There is also a cafe and souvenir shop here but it usually doesn’t open until 9 a.m., but you’ll be able to enjoy it when you return.
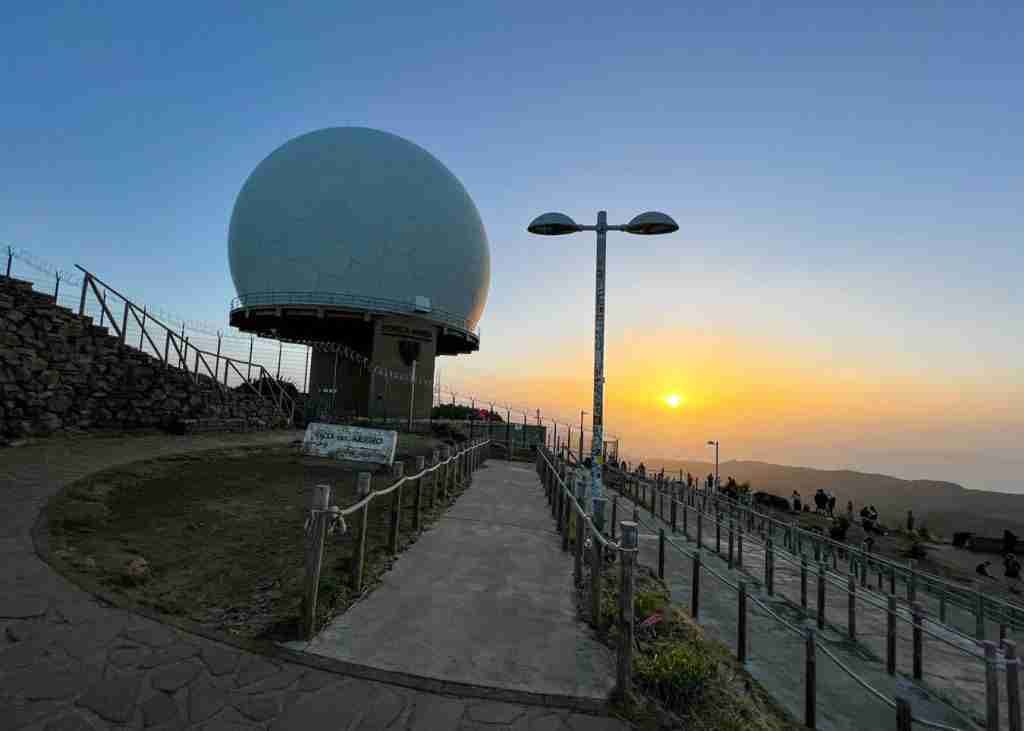
Pico do Arieiro Summit
Pico do Arieiro, which stands proudly as the third-highest peak on Maderia Island, marks the starting point of the hike.
Standing on the summit of Pico do Arieiro at an elevation of 1,818 meters (5,965 feet), you’ll get your first glimpse of the breathtaking mountain views that you will continue to see throughout the day.
From the left side of the summit, you will find a well-maintained path made out of stones.
You will see a trail sign for PR1, which shows two alternative footpaths to get to Pico Ruivo. The west footpath to Pico Ruivo is 6.1 km long and the east footpath is 7 km long. The eastern part of the footpath near Pico das Torres remains closed.

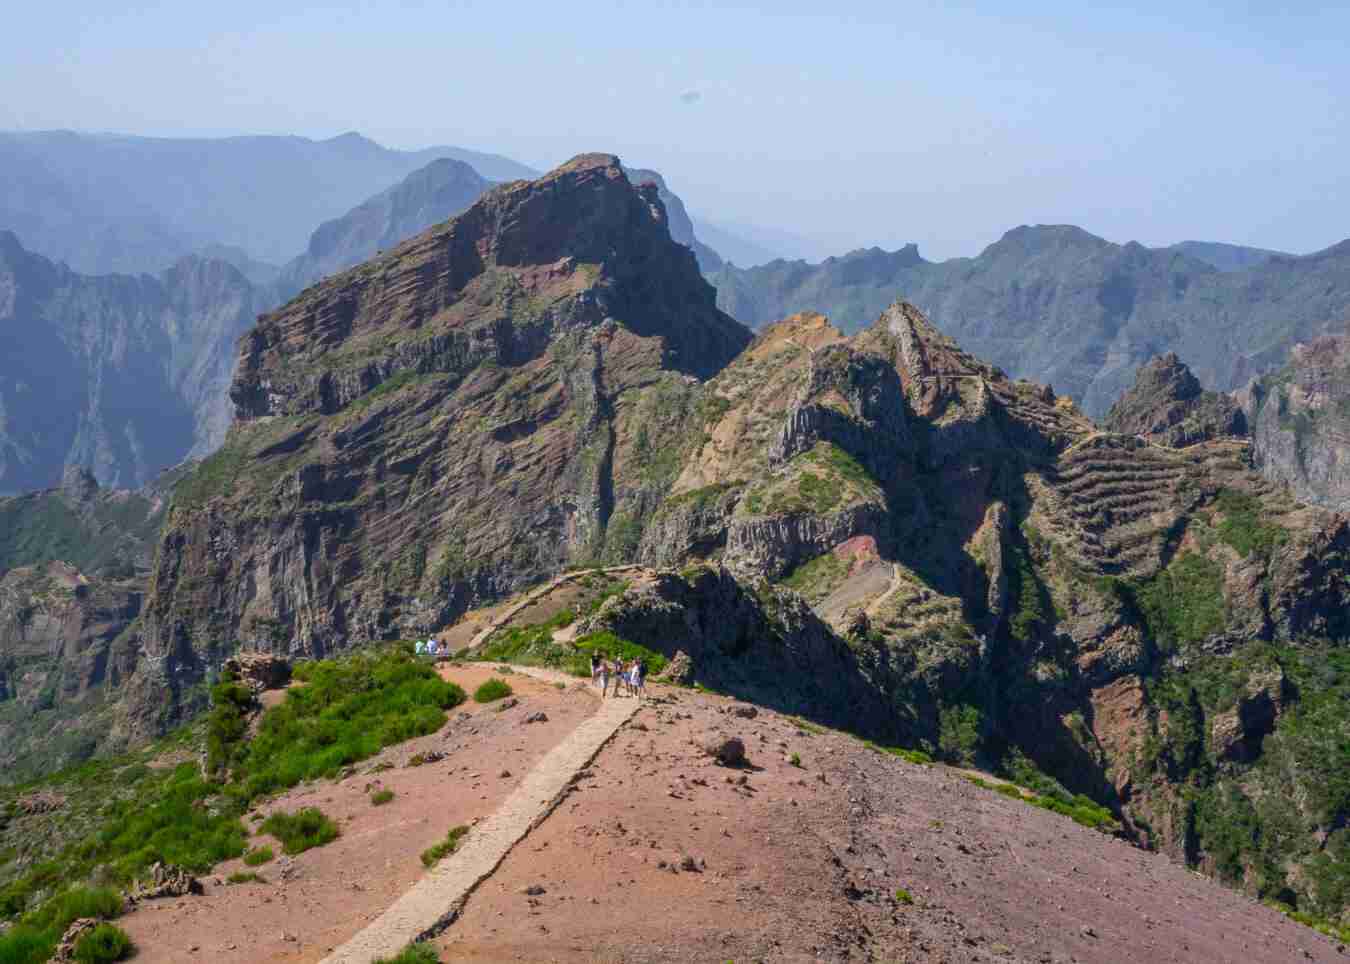
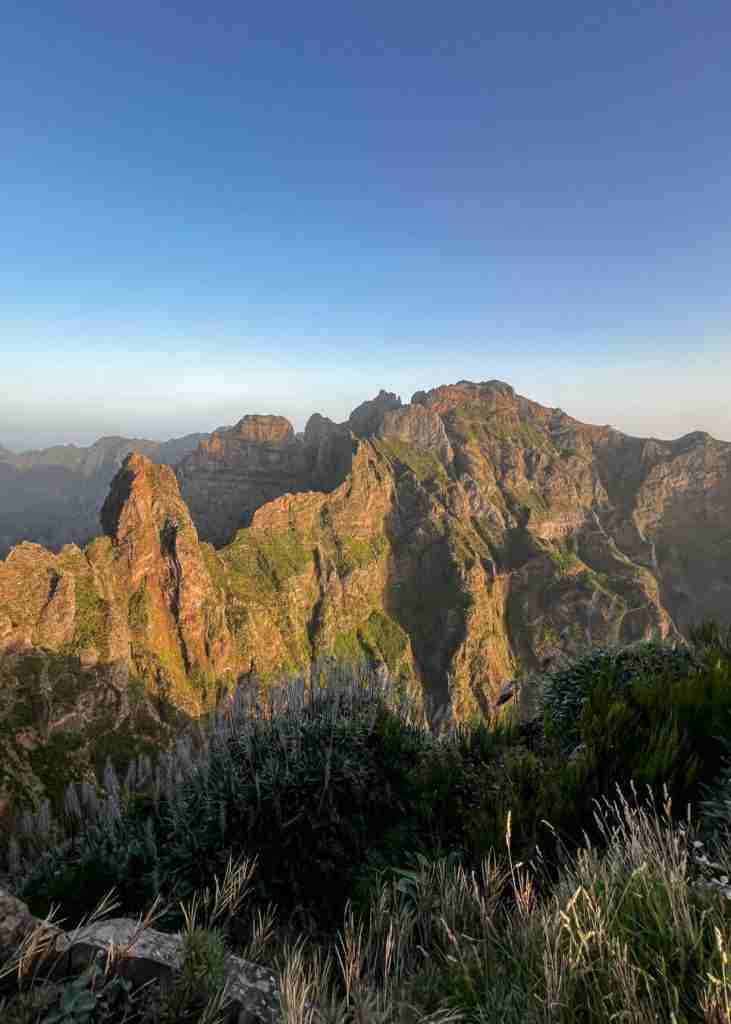
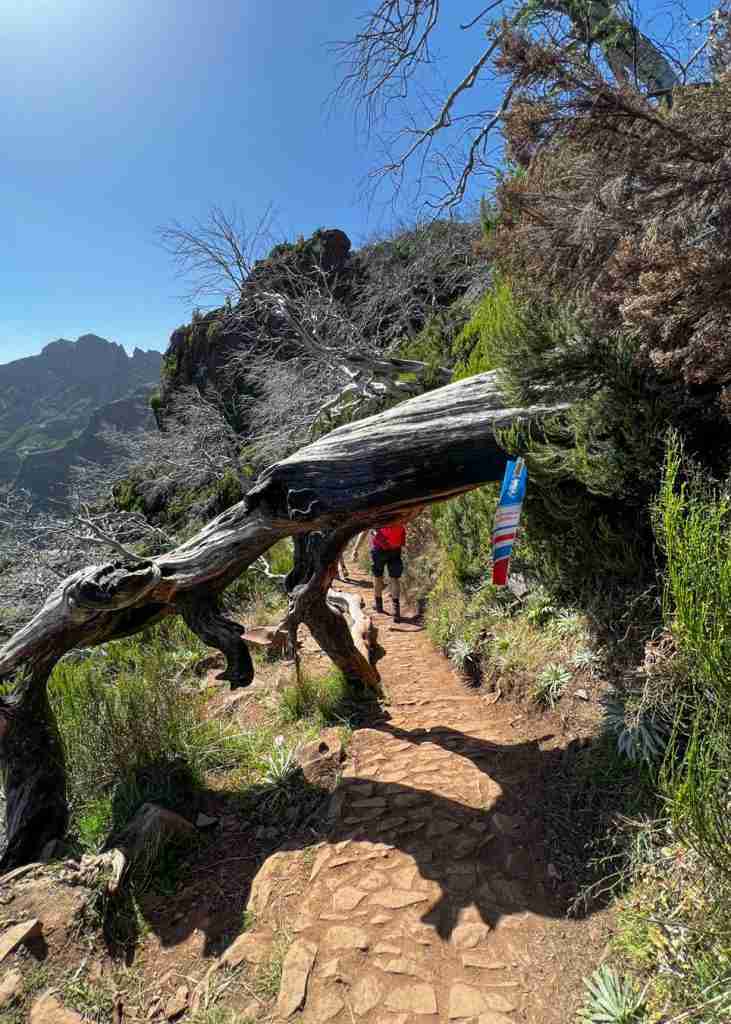
The first few steps along the trail are often considered among the most spectacular parts of the entire Pico do Arieiro to Pico Ruivo hike as you are surrounded by picturesque landscapes and diverse flora everywhere you look.
I thought the topography here was incredible and you can easily see why it’s one of the best hikes on Madeira. When there are low-lying clouds it transforms the landscape into an otherworldly realm.

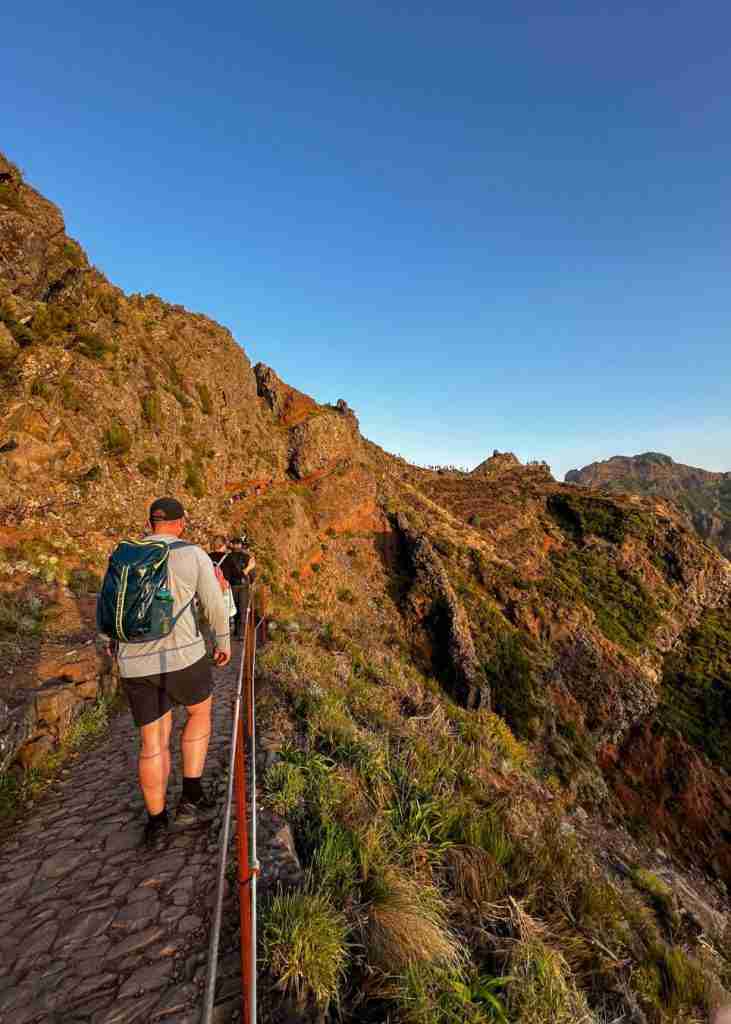
As you meander along the ridgeline, you will gradually descend before climbing up and back down the first set of staircases.
The path has handrails and chains on one or both sides in most places, which makes it a safe trail to hike.

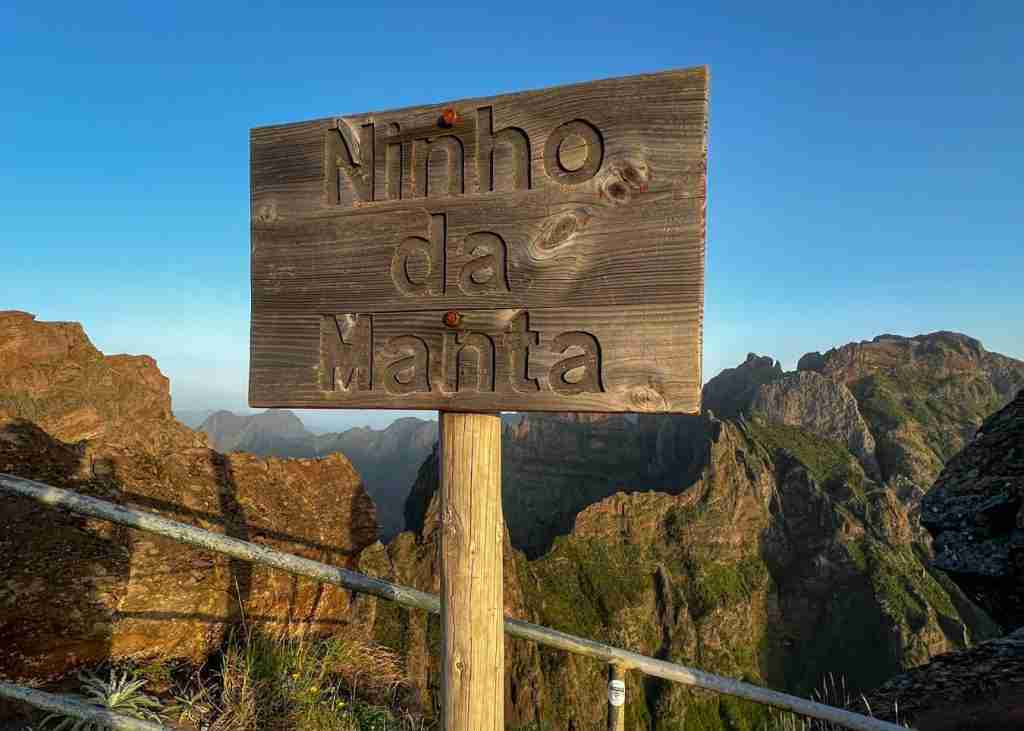
Ninho da Manta Viewpoint
The first official viewpoint on the trail is Miradouro do Ninho da Manta, or the Buzzard’s Nest. From the balcony, you can see the valley of Fajo da Nogunira, São Roque do Falal, and part of Madeira’s Central Mountain Range.
This is also the only known breeding site in the world of the Zino’s petrel (Pterodoma madeira), a species endemic to the island and considered to be the most endangered seabird in Europe.
If you are looking for another popular spot to watch the sunrise on the trail, this is a great option for those who want to avoid the crowds at Miradouro do Juncal.
It only takes about 30 minutes to walk to this point so many visitors who don’t want to complete the full hike will just walk to this viewpoint before turning around.
I definitely recommend stopping here for a couple of minutes to take photos and take in the amazing view.
Staircase To Heaven
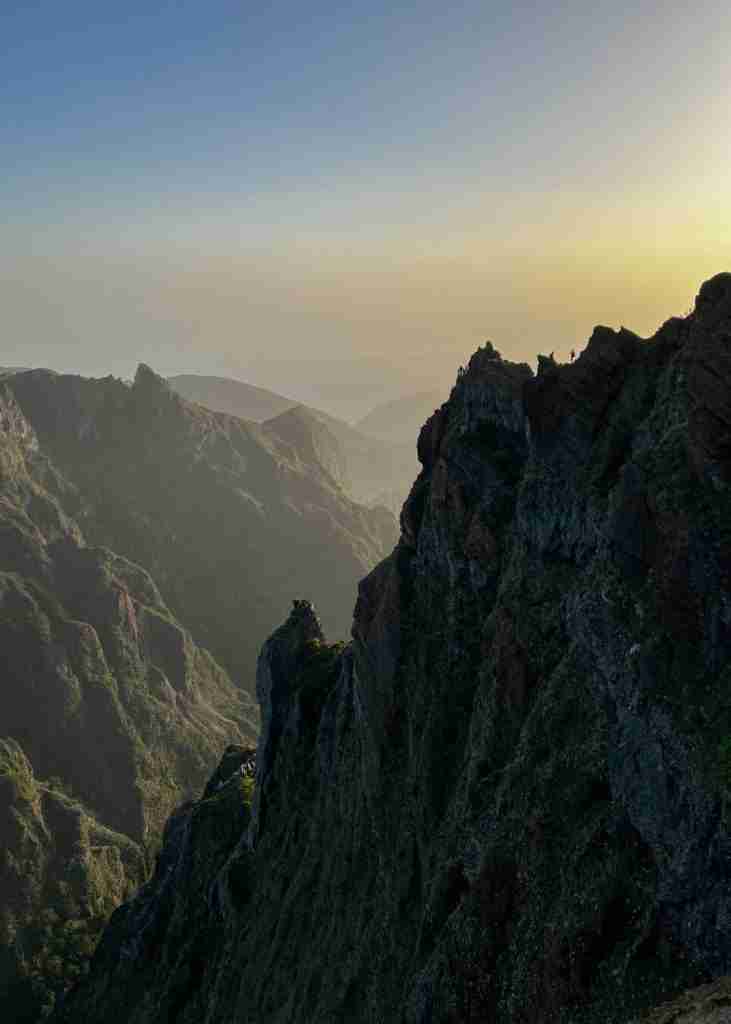
The next part of the trail is known as the “Stairway to Heaven”. You will descend a dramatic staircase that goes along the narrow ridge. It’s pretty epic because of the angle and if there are clouds below you then it feels like you are in “heaven.”
The perspective is much cooler from the bottom up. If you’re interested in capturing a photo or video, it’s worth a stop.

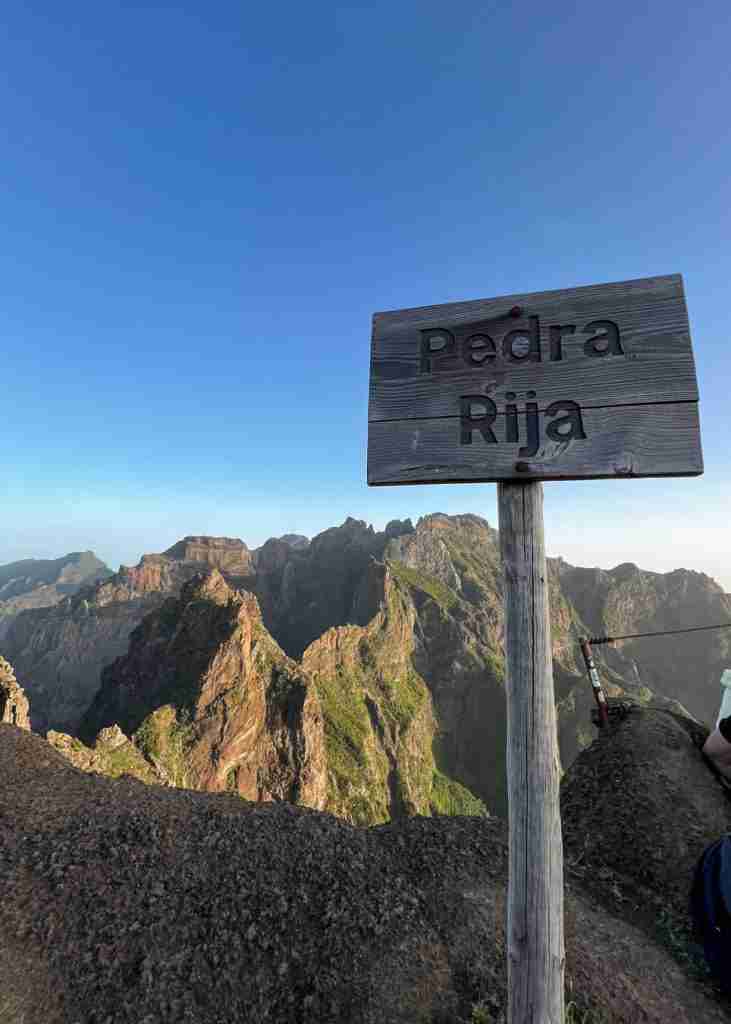
Miradouro Pedra Rija
The next viewpoint on the Pico do Areeiro to Pico Ruivo hike is Miradouro Rija, which gives you a view of both the eastern and western sides of the island.
This is also a great spot to watch the sunset if you plan on starting your hike later in the afternoon.

Another Descent
After a quick stop at Miradouro Pedra Rija, the trail continues down a set of steps as it wraps around the mountain side. It then plateaus before leading into the first tunnel on the trail.
You will see a PR1 trail sign that shows it’s 3.9 km to Pico Ruivo!
Through The Tunnels
The next section of the trail will take you through a series of tunnels and along the exposed cliffside. The tunnels were dug out of volcanic tufts and were previously used to shelter cattle and shepherds.
The first tunnel is called Tunel do Pico do Gato. I think it’s the only tunnel with an official name. As you continue along the path, you will go through a few more tunnels.
All of the tunnels vary in length, the longest being about 150 meters. In the longer tunnels, you will need your phone or headlamp in order to see where you are going. Sometimes we just used the light from the people hiking in front of us.
Most of the tunnels are wide enough to walk side by side and tall enough to easily stand in. If you are super tall, you may need to watch your head in some areas, especially when walking next along the cliffside.
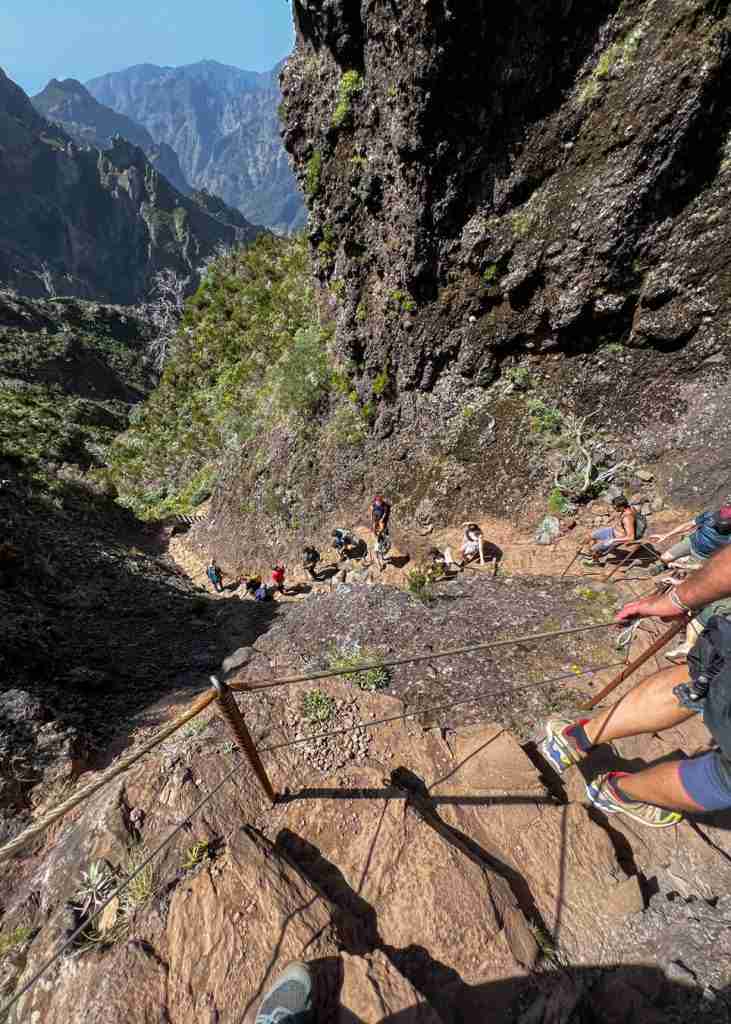
The Steepest Staircase
Okay, the next part of the hike is intense as you have to hike up a ton of stairs! What also sucks about this section is the bottlenecks that are created when there is a traffic of people going up and coming down the staircase.
The steep stairs wind up the mountain pass and around Pico das Torres in order for you to continue the hike on the other side of the mountain.
If you just keep putting one foot in front of the other, you will get up this section in no time!
Once you’re at the top of the pass, there is a small area to sit down and rest before continuing.
Up The Switchbacks
After you climb up the staircase, the trail drops down and around the back side of the mountain. Then the trail starts to climb back up on a series of switchbacks.
You will pass a forest of dead trees, which are white and look beautiful! This section does take longer than you think, but eventually, you will make it up to the last couple sections of the hike.
PR1 Trail Junctions
After making your way up the switchbacks, you will finally see the trail signs for PR 1.1, PR 1.2, and PR 1.3, as well as a glimpse of the mountain hut.

Casa de Abrigo Mountain Hut
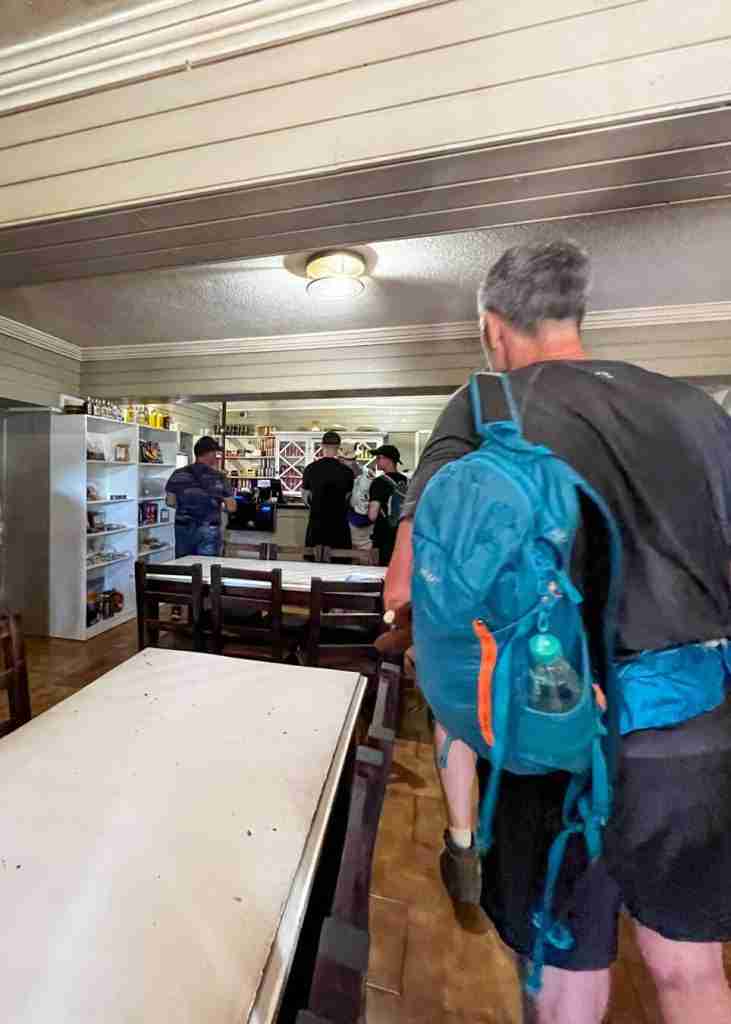
At the top of a short series of steps, you will see the Casa de Abrigo mountain hut. The mountain hut was constructed in 1939 and it now serves as a place to grab coffee, food, or have a final rest before heading up.
There are toilets available to use but you will need to pay €0,50 per person. Next to the toilets, you can fill up your water bottle with clean drinking water for free.
We decided to continue the hike and stop by the mountain hut on our way back down. I tried some cake, which I thought tasted okay, and I was bummed that they didn’t have cold drinks.

Pico Ruivo Summit
The final ascent to the summit of Pico Ruivo is a quick one. Although, I’m sure you’ll really be starting to feel the burn in your legs by now.
The trail wraps around the side of the peak and once you reach the top you will be standing on Pico Ruivo, the highest point on Madeira Island at 1,862 meters (6,109 feet) above sea level.

From the summit, you can enjoy panoramic views over the entire mountain range. There are two viewpoints, one on each side of the summit. I recommend walking to each of them.


PR 1.2 to Achada do Teixeira
After enjoying the view on the summit of Pico Ruivo, it’s time to head back down. Make sure to stop at the mountain hut for more food or water, or to use the toilet.
Near the trail leading to Achada do Teixeira, you will reach a rock formation, popularly known as Homem em pé, which means Standing Man.
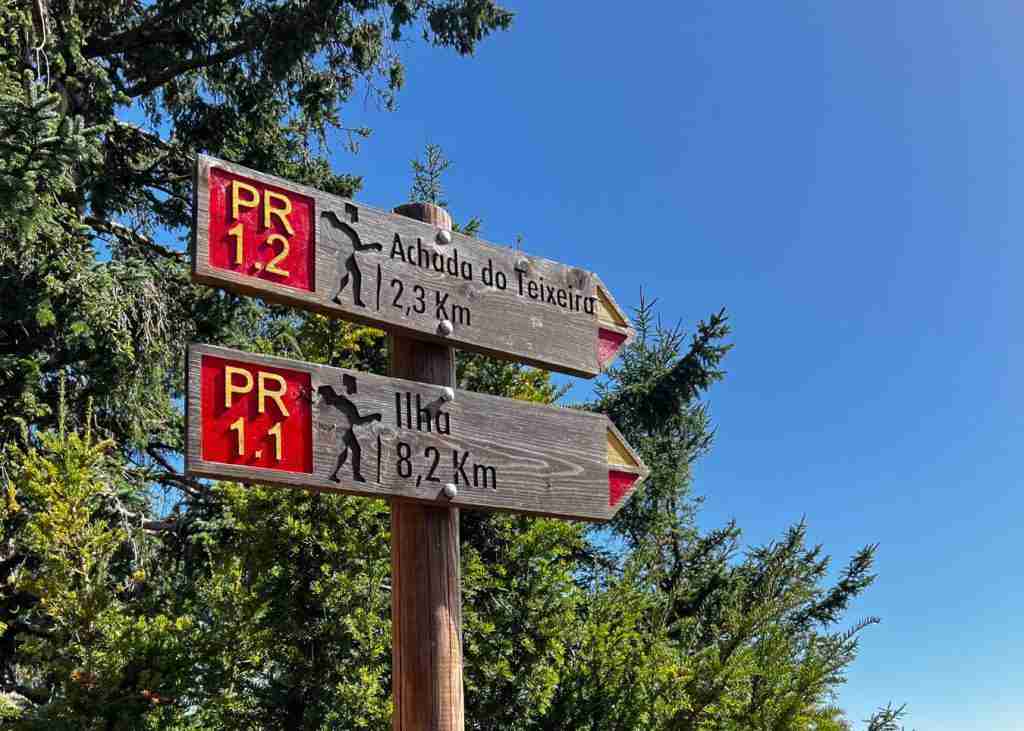
From here you can continue hiking to Acahada do Teixeira if you are using a transfer to get picked up there. The route is 2.3 km, which is less than hiking all the way back to Pico do Arieiro.
However, if you haven’t arranged a transfer or another service, it can be difficult to get back to your car at Pico do Arieiro, which is about 1.5 hours away by car.
Return to Pico do Arieiro
If you are not hiking to Achada do Teixeira, you will return to Pico do Arieiro via the same route but in the opposite direction.
The journey back down gives a different perspective as you get to see all the views that your back was facing towards on the way up.
Unfortunately, it’s not all downhill from here. On the way back you will climb about 500 meters. It’s steep and exhausting, especially if hiking in the middle of the afternoon with the sun beaming down on you.
The hike back felt like it took less time even with the all of the staircase bottlenecks. I think it’s probably because we didn’t stop as much to take photos.
It was exciting to reach the final climb of the hike. When we completed the hike, we took some photos from the summit of Pico do Arieiro before getting a drink and snack at the cafe.
From dramatic staircases to awe-inspiring vistas, each kilometer really offered something unique. I loved hiking through the tunnels, cliffs, and stopping at all of the viewpoints!
I hope you enjoyed this complete guide about the Pico do Arieiro to Pico Ruivo hike. If you have any questions, leave a comment below or send me an email.
Happy hiking!


Quick Safety Tips
- Carry water and lots of snacks! The trail gets hot and you’ll need the energy.
- Bring sun screen and a sun hat. There is limited shade on the trail.
- Wear the appropriate hiking gear, including shoes with good traction as the trail can be slippery.
- Bring a headlamp to use in the tunnels or if hiking in the dark.
- Start before sunrise to avoid large crowds.
- Stay on the designated path and avoid walking near the edge.
- Check the weather forecast and understand the weather can change quickly.
- Know how much time it will take you to complete the trail.
- Let someone else know where you’re going and when you expect to return.
- In case of an emergency, call 112.
Follow Leave No Trace Principles
- Avoid noise or actions against nature
- Do not take plants or animals with you
- Do not leave your trash behind
- Do not light fires
- Do not throw cigarette ends on the ground
- Do not change or damage the signs
Check out my Portugal travel videos!
Watch My YouTube Video: Hiking Praia da Luz to Porto de Mos
Pin To Read Later
Do you have any questions about the Pico do Arieiro to Pico Ruivo hike on Madeira Island? Let me know in the comments.
